Thursday, December 8, 2016

Momento


My momento represents the memory of my childhood forts and tree houses in the woods. My neighbors, my sister, and I lived on a nature park and acres of woods that was our playground. We created many different "cities" throughout the woods and marked tress to be able to find them.
My design of my momento began with a piece of balsa wood and I chiseled out slots for the rounded balsa wood. I wanted this element of the thinner pieces of balsa wood coming out of the thick piece to represent the branches and roots we created out forts with. The black sharpie line work represented the map we created of all of our spots in the woods and trails we created.
The challenge of this project was to create a unified design out of three materials that correlated  with the memory I wanted to recreate. I chose to focus on three aspects of nature, connections, and support in my design because when I think back on my memory those are the feelings I reside with.


Process


When researching and finding inspiration the first artist who stuck out to me and had a similar style I was looking for was Mel Kendrick.  His pieces are created with balance and unity by placing different pieces of wood and creates a tribal feel


Hilary Sanders was another artist that gave me inspiration on how to create a momento in an abstract way that incorporates the image or idea, as well as any textures that could correspond.


Meret Oppenheim's work is amazing! I love her use of texture to create a complete opposite image. The use of fur to make a tea cup shows how you can place a memory with a feeling and it does not always have to be a realistic idea.
wikipedia.com


On Logging

"The body is the primary mode of perceiving scale."


"Capacity of objects to serve as traces of authentic experience."


"The Souvenir reduces the public, the monumental, and the dimensional into the miniature, that which can be enveloped by the body."


"To have a souvenir of the exotic is to possess both a specimen and a trophy."


"Nostalgia cannot be sustained without loss."


Wednesday, December 7, 2016

Map Relief


For my map relief I focused on the idea of my close knit community in my home town and the connections I have with the people there. My design element include triangle shapes that I folded to create depth. I then clustered and connected the triangle pieces, some more clustered then others. I wanted the different shapes and sizes of the triangles to represent the different connections one makes with the people in their lives. I added string to connect some triangles that had distance between them to represent that when we grow older, we still keep these connections. My overall design incorporated negative space and balance in composition to portray my own representation of a map. 

Process:


Research:


From the start I wanted to use triangles as my component, but it was not until I looked at Grace Bonney's work that I realized I can create depth through one paper triangle.


Soap Carvings

Final Pieces:


I began my carving by outlining a basic shape to start with and then carving to scale which parts of the rooster was larger. I chose to begin with the tail and then size the rest of the body with precise steps to make sure I was visualizing each part of the rooster. Taking into account the scale of the plastic rooster to the size of my soap resulted in having to carefully watch my carving to make sure I was not veering from the size and height of the bird. My first attempt was the white rooster, the soap was harder and I could more easily control my carvings. The second attempted I used a different kind of soap that was much softer and made it difficult to maneuver the soap and the softness of the soap created many challenges for me regarding taking away to much in places and adding detailed pieces. 

Process: 


Thursday, December 1, 2016

3D to 2D


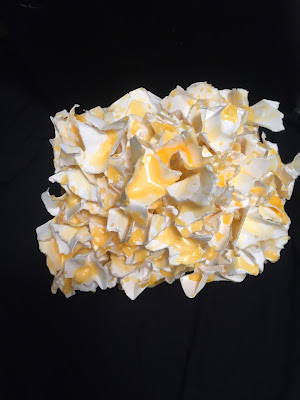
This is my balsa wood sculptures that I brought into Photoshop and duplicated and put a filter to make it brighter and created popcorn!

Saturday, September 24, 2016

Balsa Wood


For this piece I started by focusing on texture by creating a mix of crumbled stock paper and wood glue on top of a piece of balsa wood. As I worked on creating a base for the piece I ended up creating for long legs out of the balsa wood, which changed my concept to scale because of the contrast in size between the large textural top piece and the skinny legs that are holding it. The top is very bulky and heavy, while the legs are very skinny and delicate. When I started this project I would never have expected this would be the final product because it is not my style of work, but I love how it turned out, the refined long legs and the textural top work together so well.


For this piece I created a very symmetric, simple geometric piece. As I worked on the piece I developed a focal point from both the front and the back of the piece by connecting the group of pins to seem as though they are coming through the wood and can be seen from the back side. I started designing this piece by using different square sized balsa wood pieces and connected them with pins, I then created a base to hold the squares together. I outlined the squares with masking tape to create unity. I placed bunches of pins on the interior of the square and then added a bunch to the other side to create a focal point that connected both sides of the piece. I had a lot of trial and error with this piece but in the end there was strong unity in the design as a whole.


For this piece I intended to show repetition through the layering of triangles made from tracing paper and white stock paper. I started by layering the triangles through a pin and connected it to a rectangular piece of balsa wood. Next, I built a square prism to hold the swinging layered triangle piece in the middle. I then cut smaller triangles and layered them onto a smaller rectangle and placed it on top, to create a layered, repeating pattern. My final solution turned out a lot different then I had planned, but through trial and error the end design created a frame of balsa wood that enclosed the hanging triangle pattern.


Process Pictures


Tuesday, September 13, 2016

Masking Tape Shoes

Process:


The challenge of the this project was to build a pair of shoes with only masking tape. I started by cutting up an old pair of vans and measuring each piece of the van and tracing the pieces onto a stacked layer of masking tape. Once I had the basic shapes of the shoe created, I began to add layers of tape onto the individual pieces to create a sturdy base. For the sole of the shoe I began with an outline of the shoe and added several pieces of tape to create a thick bottom layer, then to add padding to the shoe I rolled pieces of tape and placed them on the sole and then added an outline of the shoe on top of the padding. Once I had the sole and base of my shoe secure, I began to create the outer sole of the shoe by layering thin pieces of tape and tracing the perimeter of the bottom, covering the padded area and creating a sturdy base for the top of the shoe to be placed.
The next step, was to take different components of the top of the shoe and continue to layer the tape to make each part sturdy. Once all of the top parts were created, I could fit them together and tape them to hold the shoe in place.
To create the decorative elements I decided to layer tape and cut out an outline of the sole and the outer sole. Then I placed the tape over the sole and embossed the design with a ballpoint pen. For the outer sole I took the layered tape and my exacto knife to slit little lines in a diagonal fashion.
Using masking tape as the one and only material created a challenge in using this material as a foundation and a decorative tool. Visualizing a shape and trying to recreate that shape takes patience. To solve this problem I decided to create puzzle pieces of the parts of the shoe and fit them together, rather than trying to create one large piece.